

How to Clean an Essential Oil Diffuser Properly
Table of Contents
- Why and When to Clean Your Essential Oil Diffuser
- What You'll Need Before You Start
- Step-by-Step: How to Clean Your Essential Oil Diffuser Properly
- How to Clean Your Diffuser with Vinegar
- How to Deep Clean an Essential Oil Diffuser
- How Often to Clean an Essential Oil Diffuser
- How to Clean Your Diffuser Between Oils
- Safety Precautions and What Not to Submerge
- Frequently Asked Questions
Last Updated: October 12, 2026
Why and When to Clean Your Essential Oil Diffuser
A clean essential oil diffuser works better and lasts longer.

Most people wait until their diffuser stops working to clean it. That's too late. Regular cleaning prevents problems before they start.
Daily users should clean weekly; occasional users every two weeks; heavy users with multiple oils even more often.
At Castellanos Housing, we treat diffuser maintenance like caring for any cherished home item: a little attention now extends its life.
What You'll Need Before You Start
Gather these items before you begin cleaning your essential oil diffuser:

- Distilled or filtered water (not tap water)
- White vinegar or rubbing alcohol
- Soft cloth or microfiber cloth
- Cotton swabs or cotton balls
- Small bowl or cup
- Mild dish soap (optional)
- Dry towel
You don't need expensive products. White vinegar works as well as any commercial cleaner, and rubbing alcohol also dissolves oil buildup.
Avoid harsh chemicals: bleach, acetone, and aggressive solvents damage plastic parts and the ultrasonic plate. Stick to gentle, natural cleaners.
Keep your manual nearby, models differ, and knowing which parts are removable prevents mistakes.
Step-by-Step: How to Clean Your Essential Oil Diffuser Properly
Step 1: Unplug and Empty the Water Tank
Always unplug your diffuser first. Never clean an active or plugged-in device.
Empty leftover water completely; sitting water can develop bacteria or mold.
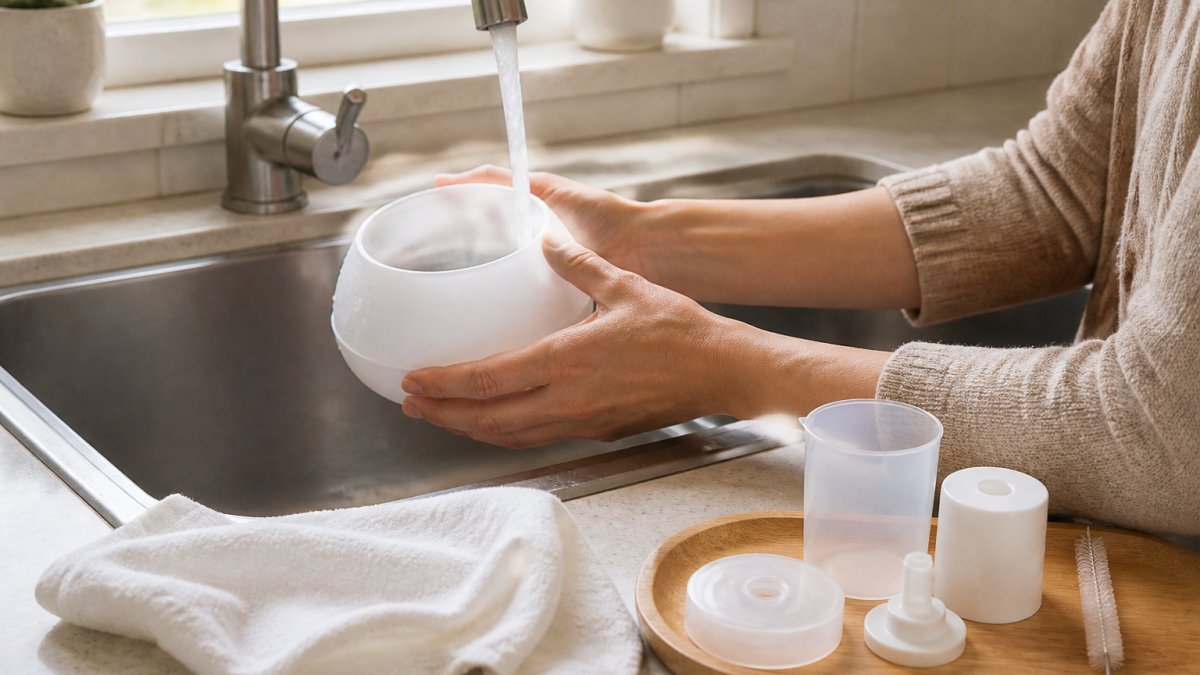
Let it cool a few minutes if it's been running, hot surfaces can burn.
Step 2: Rinse the Water Reservoir with Clean Water
Fill the tank with distilled water, which has no minerals; tap water leaves deposits that build up over time.
Rinse and repeat 2-3 times until the water runs clear.
This removes loose debris and leftover oils, easing the next steps.
Step 3: Wipe the Interior with a Soft Cloth
Wipe inside the tank with a soft, damp cloth, focusing on corners and seams where oil collects.
Don't scrub hard or use rough materials, soft cloths protect the finish and won't scratch plastic or metal.
For stubborn residue, dampen the cloth with equal parts white vinegar and water to dissolve buildup without harsh scrubbing.
Step 4: Clean the Ultrasonic Plate or Atomizer
The ultrasonic plate creates the mist and sits at the tank's bottom, where oil buildup accumulates most.
Dip a cotton swab in white vinegar or rubbing alcohol and gently rub the plate with light pressure, aggressive scrubbing damages the delicate surface.
If your diffuser has a removable atomizer, follow the manufacturer's instructions, some rinse under running water, others need careful hand-cleaning only.
This step is critical for strong mist output.
Step 5: Address Hard-to-Reach Areas with a Cotton Swab
Use cotton swabs on tight spots: the mist outlet, crevices, and tank edges all collect residue.
Dampen the swab with vinegar or alcohol. Work gently into small spaces. Replace swabs as they become dirty.
This prevents musty odors from leftover oil in hidden areas.
How to Clean Your Diffuser with Vinegar
White vinegar is the default cleaner for most diffusers because its acetic acid breaks down the polymerized oil film on the plate and tank walls, but it isn't right for every diffuser.
The standard vinegar method
Mix equal parts white vinegar and distilled water, fill the tank halfway, and let it sit 10-15 minutes, the acetic acid needs contact time to soften hardened oil.
Swish, pour out, and rinse with distilled water 2-3 times until you can't smell vinegar, residual odor transfers to your next oil.
For heavy plate buildup, dip a cotton swab in straight white vinegar, apply directly, let it sit 2-3 minutes, then wipe with a damp cloth. Never scrub, the ceramic disc cracks under pressure.
When vinegar is the wrong choice
Vinegar's acidity matters for certain diffusers:
- Nebulizing diffusers have no water tank and no ultrasonic plate; an air pump atomizes oil through a glass or metal nozzle. Vinegar can corrode the internal air pump and degrade the nozzle seals. Clean them with isopropyl alcohol instead, following the manufacturer's instructions.
- Diffusers with painted or coated exteriors can lose their finish if vinegar sits on the surface. Keep vinegar inside the tank only.
- Diffusers with metal accents or trim (common on ceramic and glass models) may tarnish if vinegar contacts the metal. Wipe those surfaces with a damp cloth only.
- Any diffuser with a manufacturer warning against acidic cleaners, some brands specify alcohol-only cleaning to protect proprietary coatings on the ultrasonic plate.
Vinegar vs. the alternatives
| Cleaner | Best for | Avoid on |
|---|---|---|
| White vinegar (diluted) | Routine tank cleaning, mineral film, general oil residue | Nebulizers, painted exteriors, some coated plates |
| Isopropyl alcohol (70% or higher) | Ultrasonic plate, targeted oil removal, nebulizer nozzles | Prolonged soaking of plastic parts; can cloud some clear plastics |
| Citric acid solution | Hard water scale and mineral deposits | Same cautions as vinegar; also acidic |
| Mild dish soap | Exterior covers and removable plastic parts | Inside the tank, soap residue interferes with mist and scent |
A common pattern: vinegar for weekly tank cleaning, alcohol for spot-treating the plate and crevices. That covers oil residue and mineral scale without overusing either.
If you have hard water
Tap water leaves calcium and magnesium deposits vinegar may not fully remove. For a white, chalky film, dissolve 1 tablespoon of food-grade citric acid powder in 1 cup of warm distilled water, pour it in, and let it sit 20-30 minutes. Citric acid beats vinegar on mineral scale and rinses clean. Going forward, use distilled or filtered water to prevent scale returning.
160ML Ultrasonic Air Humidifier Clear Cactus Color Light USB Essential Oil →
How to Deep Clean an Essential Oil Diffuser
Deep clean monthly for heavy users or when mist output weakens.
Stop it, let the solution sit 15-20 minutes, then pour it out completely.
Fill with clean distilled water only, run 5 minutes to flush remaining vinegar, then empty and repeat 2-3 times.
Reassemble only when all parts are completely dry, trapped moisture damages electrical components.
This removes stubborn buildup regular cleaning misses, so your diffuser performs like new.
How Often to Clean an Essential Oil Diffuser
Cleaning frequency depends on use: daily users should clean weekly to prevent oil hardening inside the tank.
The more oils you use, the more frequently you should clean.
Create a simple schedule, a calendar note or phone reminder. Consistent cleaning beats removing months of buildup.
Watch for signs: weak mist, unusual odors, or visible residue all mean it's time to clean.
Regular cleaning extends diffuser life. A well-maintained diffuser can last years. Neglected diffusers often fail within months.
How to Clean Your Diffuser Between Oils
Switching oils without cleaning mixes scents into unpleasant combinations.
Empty the tank and rinse with distilled water 2-3 times to remove the previous scent's residue.
Don't use soap between oils, a water rinse is enough, and soap residue can create unexpected scents.
Some people use separate diffusers per oil to prevent scent mixing entirely.
Let the tank dry completely before adding new water and oil, leftover moisture dilutes oil and reduces mist quality.
Safety Precautions and What Not to Submerge
The most important rule: never submerge the electrical base. It holds the motor, transducer wiring, and control board, water reaching any of them can short the unit, create a shock hazard, or corrode connections beyond repair.
Only the tank and removable parts should get wet. If the tank isn't removable, clean it in place with a damp cloth and cotton swabs, never under a faucet.
What to keep dry, by diffuser type
Cleaning rules differ by design, and the wrong method can damage a diffuser that would otherwise last years.
Ultrasonic diffusers (the most common type) use a vibrating ceramic disc to create mist.
Nebulizing diffusers have no water tank; an air compressor pushes oil through a glass or metal nozzle.
Evaporative diffusers use a fan to blow air across an oil-soaked wick or pad.
Heat-based diffusers warm oil to release scent.
Electrical safety
- Unplug before any cleaning, not just switched off.
- Let it cool at least 10 minutes if it's been running, especially heat-based models.
- Never plug in a diffuser with moisture on the base, cord, or prongs, air dry completely first.
- Keep water away from vents, the power button, cord connection, and indicator lights.
- Don't use boiling water, it warps plastic tanks and cracks the ultrasonic plate. Warm water is fine.
What not to use
- Bleach, damages plastic, leaves residue that off-gasses into your air.
- Acetone or nail polish remover, melts many plastics on contact.
- Abrasive scrubbers, steel wool, or scouring pads, scratch the tank and plate, creating rough surfaces where oil and bacteria collect faster.
- Harsh solvents, degrade rubber gaskets and seals, causing leaks.
Troubleshooting: when cleaning doesn't fix it
If you've cleaned your diffuser properly and it still misbehaves, match symptom to cause:
Weak or no mist. The plate likely has mineral scale or hardened oil film. Soak it in straight vinegar or citric acid solution 20-30 minutes, then wipe gently. If mist is still weak, the plate may be worn out, discs typically last 1-3 years, and a replacement disc or new unit is the fix.
Visible white or brown residue that won't come off. White residue is mineral scale from tap water, treat with citric acid.
Water leaking from the base. A damaged gasket or seal. Stop using it immediately, water in the base is an electrical hazard.
Mist smells like the last oil you used, even after cleaning. This is normal for the first few minutes of a new oil.
When to call the manufacturer
If your diffuser is under warranty and cleaning can't fix the problem, contact the manufacturer before attempting repairs, disassembling the base yourself typically voids the warranty. Most brands replace a defective unit within the warranty period if you followed the manual's cleaning instructions.
Frequently Asked Questions
How often should you clean an essential oil diffuser?
Clean your essential oil diffuser weekly if you use it daily, and at minimum every two weeks for occasional use. Empty and rinse the water tank after each use to prevent mold and mildew growth. A deeper cleaning with vinegar or citric acid should happen monthly. Regular maintenance keeps your diffuser working efficiently and extends its lifespan.
Can you clean a diffuser with vinegar?
Yes, white vinegar is one of the safest and most effective cleaners for essential oil diffusers. Fill the water tank halfway with equal parts white vinegar and clean water, then run the diffuser for 5-10 minutes to loosen oil buildup and residue. Empty, rinse thoroughly with fresh water, and run the diffuser again with plain water to remove any vinegar smell before using it with oils again.
What should you not submerge when cleaning a diffuser?
Never submerge the electrical base, power cord, USB connection, or any internal electronic components in water. Only the removable water tank, cover, and ultrasonic plate (if detachable) can be safely rinsed. Wipe the interior with a damp cloth instead of soaking it. Always unplug the diffuser before cleaning and ensure all electrical parts stay completely dry before plugging it back in.
How do you remove essential oil residue from a diffuser?
Run the diffuser with a vinegar and water solution for several minutes to break down oil buildup. Use a cotton swab dipped in rubbing alcohol to clean the ultrasonic plate and tight spots where oil accumulates. For stubborn residue, soak the removable tank in warm water with a few drops of mild dish soap or castile soap for 15-20 minutes, then scrub gently with a soft cloth and rinse thoroughly.